February 24, 2013

Ruby Rock-It Baby Girl Card Set

This month at Ruby Rock-It we have been highlighting the adorable new mini ranges. I have this set of cards up on the Ruby Rock-It blog today featuring the Baby Girl mini range.


I began with a trio of pre-cut embossed card bases. I could get spoiled by those- no need to devote time to cutting, scoring, and folding them from scratch! Using the same general design, I layered cardstock and embellishments onto the three card bases, adhering each layer with foam squares for dimension.

One of my favorite parts of the Baby Girl mini theme line is the Snippets cardstock- I loved how easy it was to cut out 3 of the snippets, round their corners, and use them to build the focal points on my card fronts!


For my supply list and awesome projects by my teammates please visit the Ruby Rock-It blog.

February 21, 2013

Ruby Rock-It Vellum Treat Pockets

I recently made these sweet treat-filled vellum pockets using the gorgeous Bella! papers and embellishments from Ruby Rock-It Bella! Fundamentals.


I started with the oh-so-perfect for love-themed projects vellum with hearts sheets from the fundamentals line. I simply cut 3 sheets of the vellum in half, which gave me 6 pieces of vellum for 6 treat pockets.

I then scored the pieces of vellum horizontally at 2-inches from each end and vertically on one end at about 3/4-inch.

After folding and creasing the score lines with a bone folder, I used my adhesive tape gun to adhere the folds to form the pockets.


I wrapped a band/strip of Bella! wedding paper in various patterns around the vellum and adhered the strips to the backs of the pockets.

After adding some beautiful Bella! die cut glittered hearts (stamped with sentiments from my stash), dimensional heart stickers, and organza brads, all that was left to do was to add some delicious treats to the pouches.

Of course, I had to sample the chocolate to make sure it would be acceptable :)


My daughter gave these to her cousins last week for Valentine's Day, but the theme could very easily be adapted to whatever suits your needs :)

If you'd like to see my list of supplies used, please visit the RRBF blog, HERE.

February 20, 2013

The Bella Buzz February 2013 Newsletter

Whew it's been quite a busy time around here with all of the unpacking and organizing. I haven't had much chance to update this little blog of mine lately, and this is nearly a week overdue by now, but I have something fun to share!


I'm honored to have a layout featured in the Bella Blvd newsletter this month in a column about past Bella products. You can view and download the newsletter HERE.

February 19, 2013

My Creative Sketches February Sketch Challenge

The February sketch challenge at My Creative Sketches is up and running. Here's my take on the sketch:


I used the My Creative Scrapbook February Main kit featuring Crate Paper's beautiful Fourteen collection. If you'd like to get your hands on these fabulous kits hurry on over to the My Creative Scrapbook website and sign up.

Here's the February sketch:

and here's the prize package!
Can you believe all that beautiful product?!

The challenge winner is chosen by random draw, so get your entry in! All of the details can be found here.

February 10, 2013

A Peek Into My Design Process

Hi everyone, today I'm sharing a peek into my design process for one of my layouts featuring the beautful February Creative Kit from My Creative Scrapbook kit club.


While planning my design, I about fell over when I noticed how wonderfully the large flowers on the Echo Park Love Story "Romance" paper matched the ones on my daughter's hair accessory and tunic. So I knew I wanted those flowers to stand out on the layout.


I used my precision scissors to cut out one of the flowers, and when I saw how pretty it was going to look on my layout, I decided I needed more of them.


So I cut out 2 more flowers for a total of 3 (I like to use embellishments in odd numbers... 1, 3, or 5... as odd numbers of items tend to be more visually pleasing than even numbers of items (ever notice how restaurants usually serve appetizers in sets of 3 or 5? Ahh now I'm hungry)).


I don't usually fussy cut but I guess the addiction doesn't take long to set in.  The doily-type shapes on Echo Park's "Roses" paper were screaming at me to be cut out.


As with the flowers, I cut out 3 of the doily shapes.


The gorgeous white gem Prima flower was the perfect thing for me to build my embellishment cluster around. I love how it stands out so elegantly among all of the pink things.


By the way, do you notice I have 3 sets of embellishments on my layout- the big cluster on the bottom right, a small cluster on the top left, and a banner on the top right? There's my odd number of clusters.

Furthermore, do you notice the number of embellishments that are contained within each cluster? The big one has 7, the small one has 3, and the banner is 1 (with 5 parts)- again, all odd numbers.

and, if you mentally draw an imaginary line from one cluster to the second one, then another line from the second to the third one, and another line from the third one back to the first cluster, can you imagine how those 3 lines form a visual triangle? That's a simple design principle to draw the eye to the center, where the photo is.


I love to add little finishing touches on my work, usually in the form of glitter glue or pearl pen accents. In the above photo you can see that I lined the edges of the red heart with little "pearls" using my pearl pen. I did the same for 1 heart in each of the 3 sets of embellishment clusters to balance the detailing.


I couldn't scrap without my foam squares. I use them to adhere my photo to the page so that I can easily tuck things behind it. I also use them to adhere most of my embellishments and title stickers. A little dimension goes a long way.

Thanks so much for stopping by today!

February 6, 2013

My Creative Scrapbook February Creative Kit

I'm excited to be able to share another My Creative Scrapbook kit with you today- the February Creative Kit! This super sweet, super cute kit features Echo Park Love Story and includes such pretty Primas, trims, and more. I love that this kit is all about love but also versatile enough to use with photos of my daughter and not just romantic love!

Here's what I created with the kit so far:

These photos of Allison were taken during a visit to our house while construction was still taking place. She was thrilled about the progress that had been made to her bedroom since the previous visit.


This is one of those everyday moments photos- we were standing at the entrance to our hotel waiting for Daddy to pull the car around. She's really a happy little girl almost always willing to ham it up for the camera.


A rare photo with me in it! I've recently been inspired to quit using the excessive weight gain as an excuse... my daughter needs some photos of her mommy, so I will be getting in front of the camera more often (on that note, this post is a really good read about getting over feeling too fat to be in a photo).


Check out the February Creative kit!


Visit the My Creative Scrapbook website, here, for information about reserving your kit.

February 5, 2013

My Creative Scrapbook February Main Kit

It's reveal time at My Creative Scrapbook kit club! The kits this month are bursting with everything you need to create your love-themed paper crafts whether the subject is your significant other, your child, or anyone/anything that you adore.

The Main Kit this month features the gorgeous Crate Paper Fourteen collection and is complemented by some lovely Authentique goodies. Just wait until you see the pretty embellishments!

I created these layouts with the kit and still have lots of product left over:


We've been in our house for almost a week now! Gosh it feels so wonderful after waiting for so long. Unpacking and organizing is certainly a process, but we're gettin' there :)

Here's a photo of the February Main Kit:


I hope you'll take a few moments to check out the My Creative Scrapbook design team gallery which is loaded with an enormous amount of beautiful layout, card, and project samples using the kits.  You can also find lots of inspiration on the My Creative Scrapbook blog and facebook page.

Come back tomorrow, please, as I'll have my February Creative Kit work up.

February 3, 2013

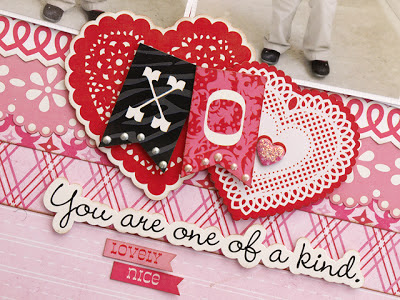
Ruby Rock-It Love Letters

Some of you may know that my family moved into our new home just a couple days ago. Well I'm excited to share a fun home decor item that I created using Ruby Rock-It Bella! Fundamentals goodies- it's our very first decorative item in the new house and I love how it looks in there :)

Krisberc-loveletters

As soon as I saw the gorgeous pink, white, and silver Bella! Wedding papers and coordinating embellishments, I just knew I had to have them out on display in the form of a home decor item. With Valentine's Day coming up, it occurred to me that I should grab some heavy-duty chipboard L, O, V, E letters from the craft store and pretty them up with the Bella! goodies. 

Krisberc-lovelettersl1

Krisberc-lovelettersl2

Krisberc-loveletterso1

Krisberc-loveletterso2

A little tip: the silver and white organza flowers that I tucked into the embellishment clusters are actually brads. I wanted to use them as stickers instead, so I carefully removed the metal fastener portion and replaced those with glue dots.

Krisberc-lovelettersv1

Krisberc-lovelettersv2

Krisberc-loveletterse1

Krisberc-loveletterse2

I'm so thrilled with how these look in our family room.  Here are the RRBF products that I used:

 
BLOGGER TEMPLATE BY DESIGNER BLOGS