August 30, 2012

Momenta + Helmar *Prizes*

Hi friends! Momenta and Helmar are collaborating for a fun week-long promotion complete with prizes!


I surf around the internet a lot for inspiration, and for some reason, whenever I see an image of a chocolate bar, it seems to really catch my attention! *grin*

Somewhere in blogland or pinterest I saw some chocolate bars being presented in cute pouches or pockets so I grabbed some yummy chocolates and came up with these for my daughter's preschool teachers:


I used some fun cardstock from Momenta's Family Outings line along with some of their awesome new metal embellishments.


I just love Helmar's Quick Dry Adhesive... it's really a perfect combination of the flexibility of a liquid glue with the convenience of a really fast drying time.  It's just what I need for assembling my accordion flowers.

 Momenta products:

Helmar products:
Quick-fix Permanent Adhesive Runner

Be sure to head over to both the Momenta blog and the Helmar blog for your chance to win Momenta and Helmar prizes!

August 24, 2012

Diamond Dust Your Chipboard

Happy Friday everyone!  The August Album kit from My Creative Scrapbook kit club included a wonderful sheet of raw chipboard shapes. I'd like to share the simple way that I altered some of those pieces to use as embellishments in the album.

For example, the sparkly butterfly in the above cluster


Supplies:
the chipboard pieces
white acrylic paint
foam paint brush
glossy accents
small paint brush (not pictured)
jar of diamond dust
tweezers

Apply 2 coats of white acrylic paint to the chipboard pieces (let dry in between applications).

When paint is dry, apply an even layer of glossy accents over the surface of the painted chipboard.

Immediately sprinkle a generous amount of diamond dust on top of the glossy-accented chipboard shape.

Tap excess diamond dust off of the chipboard shape; allow to dry.

Small chipboard pieces can fit right inside the diamond dust jar. So, immediately after applying an even layer of glossy accents over the surface of the painted chipboard, place the pieces into the diamond dust jar, wet side down, and press down on them a bit to ensure ample coverage. I use tweezers to remove the chipboard pieces from the jar.

Once dry, they are ready to be adhered to your project.  A great thing about this method is that the diamond dust does not fall off!

Have a wonderful weekend!

August 17, 2012

Momenta + Clearsnap Blog Hop *Prizes*

Welcome to the next stop on the Momenta + Clearsnap blog hop!  We're sharing some great projects using Momenta and Clearsnap products together.

If you arrived here from Tami Sanders' blog, you're in the right place.  If not, you may want to jump over to the Clearsnap blog and do the blog hop in order so that you don't miss out on any of the inspiration and opportunities for prizes.


You have a chance to win two prize packages each valued at $30.00 or more!  All you have to do to be eligible to win is visit the participating blogs on the hop and leave a comment.  Of course, we would love to have you follow our blogs, too!

Here's the prize package that Momenta is giving away:

Clearsnap will be giving away a Momenta prize package.

The deadline to leave a comment to win is 11:59pm ET on Sunday 8/19.  Winners will be announced on the Momenta and Clearsnap blogs early next week. 

I have two projects to share with you today.  The first is a mini gift bag with a matching card:


It was really simple to create these shiny, festive focal points using Clearsnap's design adhesives and foils.


Momenta Supplies:
Clearsnap Supplies:
other:
kraft bag (dollar store)
ribbon (ribbonFX)
pearl pen (Viva Decor)
white cardstock (Bazzill)
metal die (Spellbinders)
diecut machine (Provo Craft)

My second project is a thank you card:


Clearsnap's Mix'd Media Inx are super juicy pigment inks.  I used the Wisteria color on the edges of each of the flower petals to create some dimension. 


The sentiment was stamped using the Patina color and then heat embossed with clear embossing powder.  These inks are perfect for embossing due to their extended drying time.

Momenta Supplies:
Clearsnap Supplies:
other:
twine (The Twinery)
button (misc.)
white cardstock (Bazzill)
stamp (Verve Stamps)
embossing powder (Ranger)

Thank you so much for stopping by!
Your next stop on the blog hop is Megan Aaron's blog.

August 16, 2012

My Creative Sketches August Sketch Contest

Hi blog friends!  I wanted to let you know that the August sketch contest at My Creative Sketches starts today.  As always, there's a yummy prize package up for grabs for the randomly drawn winner.

Here's my layout:


I used Little Yellow Bicycle's Saturdays collection.  I really love this collection, especially the felt and burlap flowers.


This photo is a great representation of how happy Allison is when she's with our friend Tara.


Here's the sketch:


This contest runs from August 16th through September 14th, so there's lots of time for you to play along!  You can find all of the details along with loads of samples from the design team at My Creative Sketches, here.

August 8, 2012

Momenta Baby Shower Card

Hey everyone, I recently made this baby shower card for a very sweet friend of mine, and it's up on the Momenta blog today!


The background was made by layering 4 patterns of coordinating textured cardstock from the Cuddle & Coo pyramid pad onto a piece of pastel purple textured cardstock from the Pastels textured cardstock pad.  I then mounted those onto a piece of brown cardstock from my stash.

I wanted to really draw the eye to the super cute stork and baby sticker embellishment, so I cut an elegant shape out of white cardstock with my die cut machine and used that to frame the sticker.  I added a few drops of liquid pearl medium to the white frame to further dress it up.

The "Precious bundle of joy" sentiment is a vellum sticker from the Born to Be Wild Girl vellum sticker quote pad.  I loooooooove how simple it is to add sentiments using the vellum stickers!


Isn't that sticker pretty?  It comes pre-layered, pre-blinged, and ready to adhere to the project.  I added a couple of coordinating buttons and twine from my stash to add even more interest and texture to the card.

This is the inside of the card- a vellum sticker from the Baby Steps vellum message sticker set.

Thank you so much for stopping by today!

August 6, 2012

My Creative Scrapbook August Album Kit Reveal

Hi, today I'd like to share a mini album that I made with the August Album Kit from My Creative Scrapbook kit club.  This kit is so very beautiful!  It's jam-packed with the So Happy Together collection from Echo Park along with some gorgeous Prima flowers, a pretty doily, pretty lace and ribbon, bling, and wonderful chipboard shapes.

When I learned that I would be creating a mini album with this wonderful kit, after a bit lot of a panic (if you know me at all, you know I'm not exactly confident about my mini album making skills LOL), I decided to use this opportunity to document Allison's favorite summer activities as a 2-year-old.  So, I printed some of my favorite action shots from this summer and am so thrilled to have them all together in this mini album.


Here's a photo of the kit... pretty drool-worthy, yes?

There's lots of excitement going on all the time at My Creative Scrapbook.  In addition to the 4 big kits each month (Main, Creative, Limited Edition, and Album), Pam has added some terrific add-ons!  There's a beautiful flower kit, a fab Dusty Attic kit, a mixed media kit, and, there is going to be a project kit complete with instructions.  So check it out!

Also, there are currently 2 fun challenges up and running, complete with prize packages to be won:
The sketch contest is... here.
The lift the design team challenge is... here.

Thanks for stopping by!

August 5, 2012

My Creative Scrapbook August Creative Kit Reveal

It's reveal time at My Creative Scrapbook, and the kits this month are as wonderful as always.

I had the pleasure of working with the August Creative and Album kits (did you know that My Creative Scrapbook has several kits to choose from?  There's the Main, Creative, Limited Edition, and Album kits as well as several awesome new Add-On kits, so there's surely something(s) for everyone).  You can view all of the kits here.

The Creative Kit this month features the super cute and fun Splash collection by Little Yellow Bicycle.  It was totally perfect for scrapping photos from my family's get-together at my mom's lake house last summer.

Here's Allison and me- it was her first time in a lake.
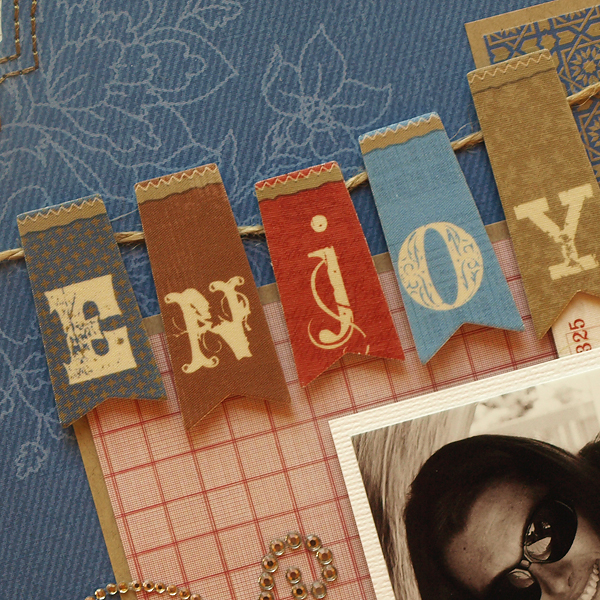
I thought she looked so cute in her life jacket:
I really love LYB's felt flowers and fabric pieces (the flip flops and scallops).
Also in the kit is a lovely Leaky Shed chippie which I layered behind the photo.

Allison had so much fun kicking and splashing:
I used more of the wonderful felt flowers and fabric embellies here.

Something extra special about this visit is that
all of my mom's kids and grandkids were together.
That is a rare occurrence as we are spread out
in Illinois, Indiana, Wyoming, and California.
It was a real treat for me to see Allison spending time with her family:
More fabric flip flop stickers along with cardstock stickers and vellum tape.

All three of us really enjoyed Allison's first ride on Grandma's boat:
Aren't those fabric swimsuit and umbrella stickers adorable?!
LYB made such adorable embellies for this collection
and Pam made sure to include the very best ones in this kit.

Here's the entire kit:
If you think you might be interested in a kit subscription, head over to the My Creative Scrapbook website.  You can reserve your kit from there.  Kit availability is limited, and there is usually a wait list, so the sooner you get over there, the better, so that you don't miss out :)  I just learned what the September kits are featuring... they are going to be really wonderful!!!

I'll be back tomorrow with my mini-album made with the August Album kit :)
 
BLOGGER TEMPLATE BY DESIGNER BLOGS