Have you ever played with Diamond Dust?
There are so many fun things that you can do with it!
It looks so pretty and doesn't flake off like some glitter does!
I'd like to show you a few very simple ways that it can be used :)
There are so many fun things that you can do with it!
It looks so pretty and doesn't flake off like some glitter does!
I'd like to show you a few very simple ways that it can be used :)
Gather your supplies:
Diamond Dust
Glossy Accents
Rock Candy Distress Stickles
Acrylic Paint
Foam paint brush
Tweezers
Raw chipboard shapes, various flowers, and other embellishments
Diamond Dust
Glossy Accents
Rock Candy Distress Stickles
Acrylic Paint
Foam paint brush
Tweezers
Raw chipboard shapes, various flowers, and other embellishments
Get ready to paint your raw chipboard shapes and letters. I chose acrylic paint in the color Vintage White.
Start painting.
Paint all the shapes and letters that you selected; set aside to dry.
Get ready to work with Glossy Accents and flowers.
Place small amounts of Glossy Accents on the edges of various petals.
Dip the Glossy-Accented side of the flower into your jar of Diamond Dust.
Press the flower down a bit into the Diamond Dust to ensure good coverage.
Remove the flower from the jar and admire your blinged up bloom :)
Isn't it pretty?
Again, for this flower place small amounts of Glossy Accents on the edges of various petals.
Dip the Glossy-Accented side of the flower into your jar of Diamond Dust.
Remove flower and admire :)
For this style of flower, use Glossy Accents to draw an outline just inside the edges of each petal.
Dip the Glossy-Accented side of the flower into your jar of Diamond Dust.
Remove the flower and admire the bling :)
Let's sparkle up a button! Cover the button with Glossy Accents.
Dip button into jar of Diamond Dust and press down for good coverage.
Remove button and smile at the pretty stuff :)
Butterflies! Who doesn't love them?! This time, use Rock Candy Distress Stickles on the body of the butterfly.
(or cover the entire butterfly with it if you'd like!)
(or cover the entire butterfly with it if you'd like!)
Using a spoon, pour a generous amount of Diamond Dust onto the areas that you Stickled.
Shake off the excess Diamond Dust.
She's pretty, isn't she? :)
Now that your painted chipboard letters and shapes are dry, let's bling them up!
Cover the chipboard letter with Rock Candy Distress Stickles.
Cover the chipboard letter with Rock Candy Distress Stickles.
Using a spoon, pour a generous amount of Diamond Dust onto the Stickled chipboard letter.
Shake off the excess Diamond Dust.
Admire :)
Let's add a twist for even more interest!
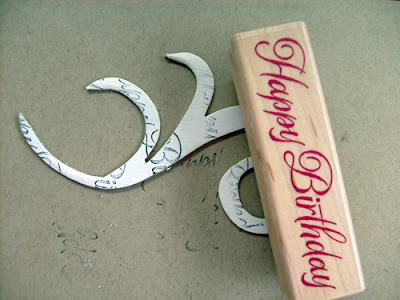
Grab any script stamp... it doesn't matter what the stamp actually says, and some ink.
I chose a Happy Birthday stamp (simply because I liked its text style) and some black ink.
Grab any script stamp... it doesn't matter what the stamp actually says, and some ink.
I chose a Happy Birthday stamp (simply because I liked its text style) and some black ink.
Ink that stamp up and randomly stamp your painted chipboard shape.
Keep stamping in various places (you may need to re-ink your stamp).
Here's the result of the stamping.
Okay, the shape is ready to be blinged! Cover the inner part of the shape with an even line of Glossy Accents.
(Or cover the shape with it entirely if you'd like).
(Or cover the shape with it entirely if you'd like).
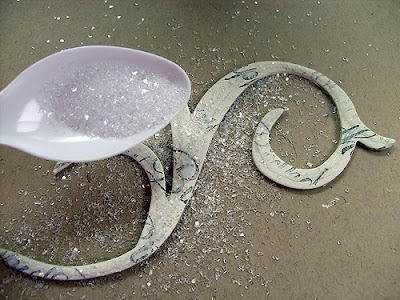
Using a spoon, pour a generous amount of Diamond Dust onto the painted, stamped, Glossy Accented chipboard shape.
Shake off the excess Diamond Dust. I love this result!
Here are the embellishments that we Diamond-Dusted today!
I hope you will find some of these quick tips useful for your projects :)


4 comments:
This is such a great idea!!! What a great way to get those prima flowers!! You could make your own and coat them! Saves you a bundle!! I don't know if I should admit it or not though, but I don't own any diamond dust!! ;) May have to be something to add to my arsenal!
What great tutorials on showing us how to use diamond dust!!!!! You did many great embellie's from it all! Have a great weekend and thanks for stopping by my blog!
e.
oh, wow!! that is fun!!
Thanks for showing and explaining the use of diamond dust! I hope I can find it anywhere in The Netherlands!! LOVE your examples!!
Post a Comment